One of the other builders I follow often says, “Building the RV-10 is a lot of putting something together then taking it apart.” I’m quickly realizing what he means. But… I’ve made some progress since my last post.
Once the replacement rear spar doubler came in, I got it clecoed in place, match drilled, and machine countersunk where appropriate. After that it was on to rebuilding the skeleton, match drilling all the skeleton parts, then taking them all off to be deburred.
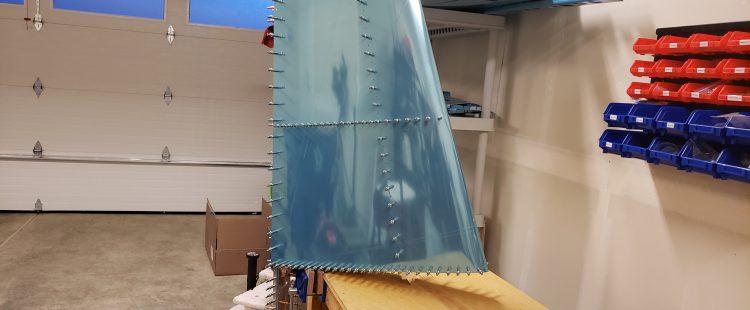
Finally, after putting the skeleton back together, I put the first piece of aluminum skin onto the plane! I was actually concerned at first because it didn’t look like it would fit. But, after putting clecos in the first row of holes, the next row lined up. Row after row, the holes lined up like falling dominos until all the holes on one side were set.
Flip it over, rinse, repeat. Or at least that’s what I thought. Getting the first couple clecos set was not easy. I ended up having to find the hole that was closest to fitting and pushing/pulling/praying until it lined up. Once the first one was in, the next hole was only slightly off. More pushing/pulling/praying/cursing and it lined up. After that, the holes were closer and closer to alignment until by the end of the row they lined up perfectly. I’m definitely starting to see airplane parts!
Skin in place, I pulled out every other cleco and match drilled the holes. Move them over, do it again. Flip the stabilizer, do it again. Move clecos over, do it again. I’m finding I’m really glad I got the pneumatic cleco tool. It doesn’t work in every situation and definitely not required, but man is it nice to have.
Now that it’s all together and match drilled… take it all apart 😂🤣. Yep, time to deburr the holes I just drilled. The little $5 electric screwdriver from Harbor Freight along with the hex deburring bit from Cleaveland Tools made deburring a snap. I was a little timid at first because of all the warnings to be light with deburring skins but once I got the hang of things it went quickly.
Finally another first – dimples! I did some dimpling with the tablet holder, but these were the first dimples on the plane. I also used every dimpling tool I have – the pneumatic squeezer, DRDT2, and pop-rivet dimpling tool. The pop rivet dimpler sucks – but luckily it’s only used for extremely hard to reach places. I’ll definitely need some practice with it though because I’m not happy with the dimples it produced in the Vertical Stabilizer. I also broke 2 of the brass mandrels used with it. The head from the steel mandrels (actually just finishing nails) were too small and just pulled right through the dies.
Next steps are to dimple the skeleton to receive the skins and then I start riveting stuff together. One more new thing – I got video cameras to record it all. Still playing around with them and I need to figure out a solution for recording that isn’t my phone since recording stops when I get a call 🙁
